
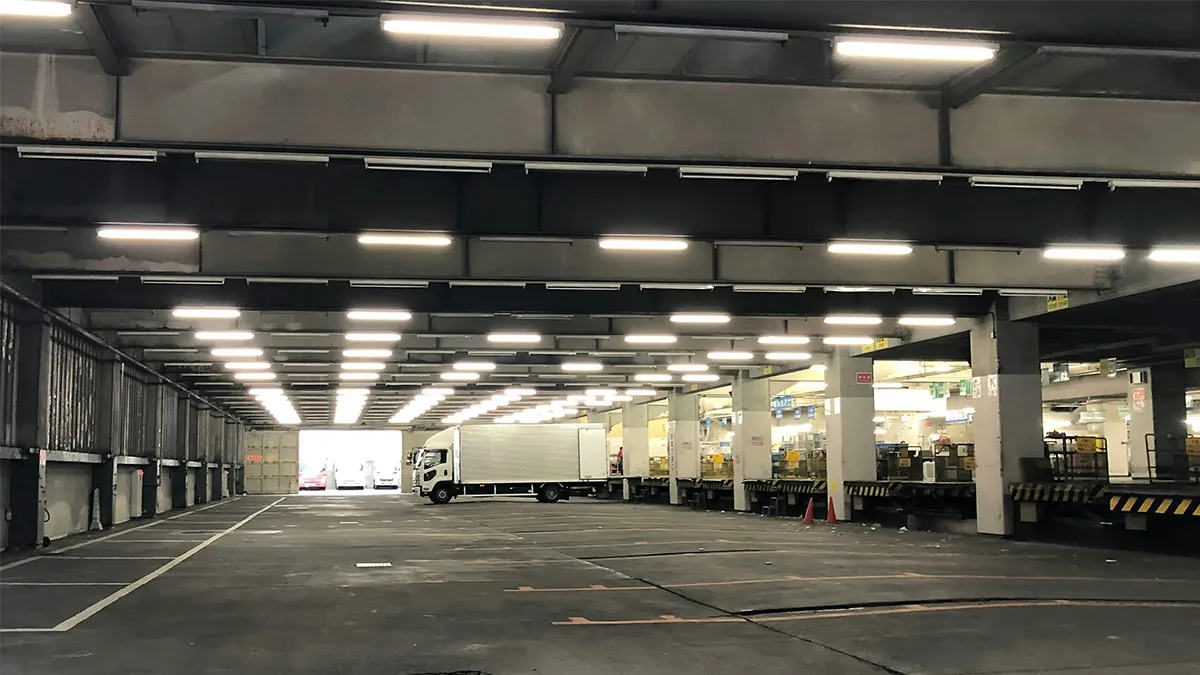
Warehouses run on two things: labor and energy. Lighting touches both. Pick the wrong fixture or mount it at the wrong height, and you get glare on the dock, shadows in the racking aisles, and a utility bill that climbs every month. Pick right, and a standard 500,000-square-foot distribution center can cut its lighting energy spend by 60–70% while improving average illuminance from a patchy 15–20 fc to a consistent 30–50 fc across the floor.
This guide covers the technical decisions that actually drive those results: fixture wattage selection tied to mounting height, beam angle matching for your ceiling geometry, row spacing math, and the spec parameters that separate durable warehouse LED high bays from cheap imports that fail in 18 months.
Why Mounting Height Is the First Decision
LED high bay lights are designed in two broad categories based on installation height:
- Low bay (12–20 ft / 3.7–6 m): Typically 60–150W, wider beam angles (90°–120°), used in smaller warehouses, loading docks, and mezzanine areas.
- High bay (20–45 ft / 6–14 m): Typically 100–480W, narrower beam angles (60°–90°), suited for main warehouse floors, large distribution centers, and bulk storage.
The reason this matters: photometric output — measured in lumens — drops with the square of the distance (inverse square law). A fixture delivering 20,000 lm at 10 ft provides only 5,000 lm of effective intensity at 20 ft. Compensating purely with wattage wastes money. Matching beam angle to ceiling height is the more efficient approach.
As a starting point, use this wattage-to-height mapping:
| Mounting Height | Puissance recommandée | Typical Lumen Output | Target Beam Angle |
|---|---|---|---|
| 12–16 ft (3.7–4.9 m) | 60–100W | 8,000–14,000 lm | 120° |
| 16–20 ft (4.9–6.1 m) | 100-150W | 13,000–21,000 lm | 90°–120° |
| 20–25 ft (6.1–7.6 m) | 150–200W | 20,000–28,000 lm | 90° |
| 25–35 ft (7.6–10.7 m) | 200–300W | 28,000–42,000 lm | 60°–90° |
| 35–45 ft (10.7–13.7 m) | 300–480W | 42,000–65,000 lm | 60° |
These ranges assume a standard reflectance environment (ceiling 70%, walls 50%, floor 20%). High-reflectance white ceilings can allow stepping down one wattage tier. Dark racking systems with black uprights and minimal ceiling reflectance require stepping up.
Beam Angle Selection: The Geometry Behind the Numbers
Beam angle defines the cone within which at least 50% of the fixture’s peak candela is delivered. A 60° beam on a 30-ft ceiling concentrates light in a 17-ft diameter circle directly below the fixture. A 120° beam on the same ceiling spreads across a 69-ft diameter — which sounds better until you realize that spreading the same lumens over 16× the floor area drops intensity proportionally.
The practical formula for illuminated diameter (D) at a given mounting height (H):
D = 2 × H × tan(θ/2)
Where θ is the beam angle. For common scenarios:
| Mounting Height | Beam Angle | Illuminated Diameter | Spacing Implication |
|---|---|---|---|
| 20 ft | 120° | 69 ft | Overlapping coverage — good for open floors |
| 20 ft | 90° | 40 ft | Standard spacing, mild overlap |
| 20 ft | 60° | 23 ft | Tight spacing needed — risk of dark spots |
| 30 ft | 90° | 60 ft | Good for wide aisles |
| 30 ft | 60° | 35 ft | Works well with 25–30 ft row spacing |
| 40 ft | 60° | 46 ft | Standard spacing at high ceiling |
For racking aisles specifically, narrow beam angles (60°) are preferred because the shelf uprights act as light blockers — wide beams wash out at the top of the rack but fail to penetrate to lower shelf levels. Mounting fixtures directly above aisle centerlines with 60° optics yields the most consistent vertical illuminance through all rack levels.
Row Spacing and Layout Calculations
Once mounting height and beam angle are determined, fixture spacing follows from the uniformity target. IESNA RP-7 (warehousing and distribution) specifies a minimum uniformity ratio of 4:1 (maximum to minimum illuminance). Many modern specifications push to 3:1 for picking accuracy, quality inspection, and safety compliance.
A practical spacing formula for achieving 4:1 uniformity:
Maximum Spacing = 1.5 × Mounting Height
At 20 ft: max spacing = 30 ft. At 30 ft: max spacing = 45 ft.
For 3:1 uniformity targets, reduce this by roughly 15–20%:
- 20 ft ceiling: 24–26 ft spacing
- 30 ft ceiling: 36–40 ft spacing
Layout patterns fall into three types:
- Square grid: Equal spacing in both directions. Simple, works for open floor plans. Fixtures positioned at grid intersections.
- Aisle-aligned rows: Fixtures positioned above aisle centerlines, with spacing matched to aisle width. Standard for selective pallet racking at 10–12 ft aisle widths.
- Staggered grid: Offset rows improve uniformity in the zones between fixtures, useful when spacing must exceed the 1.5× rule due to structural constraints.
For a 100,000 sq ft warehouse at 25 ft ceiling height with 90° beam fixtures:
- Max spacing: 37 ft (using 1.5× rule)
- Practical row spacing: 30 ft (for 3:1 uniformity target)
- Fixture count estimate: 100,000 ÷ (30 × 30) ≈ 111 fixtures
- At 200W per fixture: 22,200W total installed load
- Equivalent metal halide: 400W × 111 ≈ 44,400W (ballast losses add ~15%, effective ~51,060W)
- Estimated energy reduction: 57%
Fixture Types: Round vs. Linear High Bay
LED high bays come in two primary form factors, and the choice affects both photometrics and installation cost.
Round (UFO) High Bays
The dominant form factor for new installations. Advantages include compact size (18–24 inch diameter), straightforward single-point mounting, and availability in beam angles from 60° to 120°. Heat sink fins radiate from a central housing, and most models incorporate a replaceable driver module. The flat or slightly domed lens allows precise optical control.
Disadvantages: Coverage is inherently circular, which creates diamond-shaped gaps at grid intersections. These gaps are managed by overlap — which is why 3:1 uniformity specs typically require fixtures spaced at 80–85% of the maximum spacing rule rather than 100%.
Linear High Bays
Elongated fixtures (4–8 ft) that produce a rectangular light pattern. Better suited for racking aisles because the elongated beam mirrors the elongated aisle. A 4-ft linear high bay mounted 25 ft above a 10-ft-wide aisle produces significantly better vertical illuminance on the racking face compared to a round UFO at the same wattage.
Installation requires two mounting points (chain or aircraft cable), and luminaire alignment with aisle direction is important for optimal performance. Linear high bays also allow series mounting (daisy-chaining) for continuous illumination over long aisles without mid-row gaps.
Side-by-Side Comparison
| Paramètres | Round (UFO) | Linear |
|---|---|---|
| Light pattern | Circular | Rectangular |
| Best application | Open floor, cross-aisle | Racking aisles, conveyor lines |
| Mounting complexity | Single point (simple) | Two-point (slightly more complex) |
| Uniformity in aisles | Moderate | Élevé |
| Wattage range | 60–480W | 60–240W |
| Beam angle options | 60°, 90°, 120° | Narrow (asymmetric), 90°, 120° |
| Daisy-chain wiring | Available on some models | Standard feature |
Efficacy and Driver Specifications That Matter
Not all LED high bays produce the same lumens per watt. Efficacy has improved significantly: budget-tier fixtures in 2024–2025 typically deliver 130–150 lm/W, mid-tier 160–180 lm/W, and premium-tier 180–210 lm/W. DLC Premium requires a minimum of 160 lm/W for most high-bay categories, making DLC status a useful screening threshold.
Driver specifications worth checking before purchase:
- Power factor (PF): Should be ≥0.95. Lower PF increases reactive load on your electrical panel — a real cost in facilities with demand charges.
- Total harmonic distortion (THD): ≤10% for commercial-grade, ≤20% acceptable for basic installations. High THD stresses neutral conductors in three-phase systems.
- Protection contre les surtensions : IEC 61000-4-5 Level 3 (4kV/2kA) is the threshold for warehouse environments. Facilities near heavy industrial equipment or prone to lightning should specify 10kV/10kA.
- Dimming range: 0–10V dimming is standard. If integrating with occupancy sensors or daylight controls, confirm the driver dims to 10% or lower (not just 50%, which some budget drivers list as “dimmable”).
- Operating temperature range: Drivers rated for –20°C to +50°C ambient cover most warehouse environments. Cold storage facilities may need –40°C start-up rated drivers.
Color Temperature for Warehouse Applications
Warehouses almost universally use 5000K (cool white) for high bay applications. The reasoning is practical:
- 5000K provides the highest scotopic-to-photopic (S/P) ratio, improving perceived brightness at equivalent lumen output. Workers’ eyes in 5000K environments perceive the space as brighter than in 4000K at identical footcandle measurements.
- Label and barcode contrast is higher under 5000K — relevant for picking accuracy and inventory scanning.
- 5000K closely mimics daylight, which reduces fatigue during long shifts in windowless spaces.
Exceptions: Cold storage areas where worker comfort over short periods matters more (4000K or even 3500K). Staging areas adjacent to offices where 4000K creates a smoother visual transition. Automotive/paint mixing areas where 5000K + CRI ≥90 is specified for color accuracy.
Illuminance Targets by Warehouse Zone
IESNA RP-7 provides task-specific recommendations:
| Zone | Tâche | Éclairement recommandé | Uniformity (max:min) |
|---|---|---|---|
| General storage | Forklift traffic, visual inspection | 20–30 fc (215–325 lux) | 4:1 |
| Active picking areas | Label reading, order fulfillment | 30–50 fc (325–540 lux) | 3:1 |
| Receiving/shipping dock | Inspection, paperwork, safety | 30-50 fc | 3:1 |
| Packing stations | Detail work, label verification | 50–75 fc (540–810 lux) | 3:1 |
| Mezzanine office areas | Administrative tasks | 30-50 fc | 3:1 or ANSI A117.1 |
| Battery charging room | Routine maintenance | 30 fc minimum | 4:1 |
OSHA 1910.303 and 1926.26 set minimum illuminance requirements for general work areas (5 fc) and exit routes (5 fc), but these minimums are safety floors, not productivity targets. Treating them as design goals typically results in inadequate light for accurate picking operations.
Controls Integration: Getting the Payback to Work
Controls add 15–25% to upfront installation cost but typically reduce energy consumption by an additional 30–40% beyond the base LED retrofit savings. For a facility spending $100,000/year on lighting before the retrofit:
- LED-only retrofit: saves ~60%, leaving $40,000/year in lighting costs
- LED + controls: saves ~75–80%, leaving $20,000–$25,000/year in lighting costs
- Additional annual savings from controls: $15,000–$20,000
- Typical controls incremental cost: $30,000–$50,000 for a mid-sized facility
- Additional payback period: 1.5–3 years
Sensor types relevant to warehouses:
Passive infrared (PIR): Detects body heat motion. Reliable in static environments, but struggles in cold storage where workers wear heavy clothing or near HVAC vents that create false triggers. Coverage radius typically 40–60 ft at 20 ft mounting height.
Ultrasonic: Detects micro-motion via sound waves. Less prone to cold storage false negatives than PIR. Typical sensitivity settings allow detection of slight hand movement — useful in picking aisles where workers may be stationary but active.
Dual-technology (PIR + ultrasonic): Requires both triggers to activate and either to maintain. Reduces false-off events in active picking zones. Adds ~20% to sensor cost but pays back through reduced re-strike delay complaints.
Time delay settings: Warehouse lighting controls benefit from longer hold times (10–20 minutes) compared to offices (5–10 minutes). Frequent on/off cycling in forklift aisles adds nothing operationally and increases LED driver stress from thermal cycling.
Installation Checklist
- Structural clearance: Confirm ceiling structure can support fixture weight plus mounting hardware. UFO high bays typically weigh 8–15 lbs; no structural issue for typical steel bar joists. Verify building code requirements for seismic zones (Category D and above may require seismic-rated mounting).
- Electrical circuit load: Calculate total circuit amperage. A 20A/277V circuit supports approximately 15 × 200W fixtures at 90% NEC derating, or 12 × 200W fixtures at 80% derating.
- Conduit and wiring routing: Minimize conduit runs. EMT is standard for exposed conduit in non-hazardous warehouse areas. In areas subject to forklift damage (below 8 ft), rigid conduit or heavy-duty protective covers are required.
- Photometric verification (before installation): Run AGi32, DIALux, or manufacturer’s photometric software to verify coverage pattern. Flag any areas below target illuminance before equipment is ordered.
- Commissioning documentation: Record initial foot-candle readings at grid points across the floor (minimum one reading per fixture coverage zone). This baseline is required for DLC QPL rebate applications and serves as warranty documentation.
- Warranty registration: Register fixtures with manufacturer within 30 days. Most reputable manufacturers require registration for full 5-year warranty coverage; failure to register defaults to a 1-year base warranty in many jurisdictions.
Common Specification Mistakes
Specifying wattage without confirming lumen output: Two 200W high bays from different manufacturers can deliver 22,000 lm vs. 32,000 lm — a 45% difference in effective illuminance. Always spec by delivered lumen output at the fixture, not by wattage.
Ignoring L70 lifetime data: Budget fixtures may list “50,000 hours” life without specifying the lumen maintenance standard. Per IES TM-21, L70 means 70% lumen output retained at rated hours. A fixture losing 50% of its lumens at 30,000 hours may still claim a 50,000-hour “life.” Ask for TM-21 projection data and IES LM-80 test reports from qualified test labs.
Beam angle mismatch in racking environments: Specifying 120° beam angles for 30-ft ceiling racking aisles is a common error. The wide beam illuminates the ceiling and top of racking well but creates a significant falloff at lower shelf levels (3–5 ft above floor), exactly where picking accuracy matters most.
Underspecifying surge protection: Warehouses with VFD-driven conveyor systems, refrigeration compressors, or dock leveler motors generate transient voltage spikes. Fixtures specified to only 1kV surge rating fail prematurely in these environments. Minimum 4kV/2kA as per IEC 61000-4-5 Level 3.
Skipping emergency lighting compliance: NFPA 101 Life Safety Code requires emergency egress illumination at 1 fc average (0.1 fc minimum at any point) at floor level along the exit path. LED high bays with battery backup modules are available, but the backup circuits must be on a separate circuit from normal lighting to meet code intent. Verify with your AHJ before selecting battery-integral vs. central inverter backup systems.
Calculating Payback for a Typical Retrofit
A 300,000 sq ft distribution center with 30-ft ceilings currently running 400W metal halide (MH) high bays (actual system wattage ~460W including ballast loss):
- Current fixture count: 300 fixtures
- Current total load: 300 × 460W = 138,000W = 138 kW
- Annual operating hours: 6,000 hrs (two-shift operation)
- Annual energy: 138 kW × 6,000 hrs = 828,000 kWh
- Energy cost @ $0.12/kWh: $99,360/year
LED retrofit (300W UFO high bay, 43,000 lm, 90°):
- LED total load: 300 × 300W = 90,000W = 90 kW
- Annual energy: 90 kW × 6,000 hrs = 540,000 kWh
- LED energy cost: $64,800/year
- Energy savings: $34,560/year
Add occupancy control (20% additional reduction):
- Effective annual kWh: 540,000 × 0.80 = 432,000 kWh
- LED + controls energy cost: $51,840/year
- Total savings vs. MH: $47,520/year
Capital cost estimate:
- 300W LED fixture: $120–$180 each → $36,000–$54,000
- Controls system (sensors + dimming): $15,000–$25,000
- Installation labor: $20,000–$35,000
- Total project cost: $71,000–$114,000
- Simple payback: 1.5–2.4 years
- DLC rebate (many utilities offer $30–$75/fixture for DLC Premium): $9,000–$22,500
- Net payback after rebate: 1.3–2.0 years
Questions fréquemment posées
Q: Can I replace 400W metal halide with a 150W LED and get equivalent light?
A: In many cases, yes. Modern 150W LED high bays deliver 20,000–24,000 lm, comparable to the initial lumens of a 400W MH lamp (~36,000 lm) but accounting for MH’s faster lumen depreciation and ballast losses. At 50% of rated life, MH fixtures are often delivering only 55–60% of initial lumens. A 150W LED at 5,000 hrs still delivers 95%+ of initial lumens (L90 rated at 36,000 hrs). Conduct a photometric study to confirm, as ceiling height and spacing variables affect actual results.
Q: How long does a warehouse LED high bay actually last?
A: Quality fixtures with L70 ratings of 100,000 hours will last 16–22 years at typical warehouse operating schedules (6,000–8,000 hrs/year). More practically, driver failure before LED chip lumen depreciation is the limiting factor in current-generation fixtures. Look for modular driver designs that allow driver replacement without changing the entire fixture.
Q: What is the minimum CRI needed for warehouse lighting?
A: IESNA recommends CRI ≥65 for general industrial areas. Most LED high bays ship at CRI 70–80. For picking and quality inspection zones, CRI ≥80 is recommended — not for color accuracy per se, but because higher CRI LEDs tend to have better spectral content that improves visual acuity under the fixture. Avoid fixtures advertised as “CRI 70” for inspection areas.
Q: Should I use 120V or 277V fixtures?
A: Most commercial and industrial warehouses run 277V (single phase from 480V three-phase). Use 277V fixtures — the lower current draw (compared to 120V at the same wattage) allows longer conduit runs and more fixtures per circuit. Multi-voltage drivers (100–277V or 120–347V) are available and simplify procurement by eliminating voltage-specific stocking, but verify efficiency ratings — some multi-voltage models are 1–2% less efficient than optimized single-voltage designs.
Q: Do LED high bays need warm-up time like metal halide?
A: No. LED fixtures reach full output within 1–2 seconds of power-on. This is one of the operational advantages that controls integration leverages — MH fixtures were often left on continuously because their 15–20 minute restrike time made occupancy control impractical. LEDs can be dimmed to 10% in unoccupied zones and return to full output in seconds, making zone-level occupancy control genuinely functional.