Instalación de luces LED High Bay: Guía paso a paso y mejores prácticas
Installing LED high bay lights in a warehouse, factory, or large commercial facility is one of the most impactful upgrades you can make to your industrial space. Done correctly, it slashes energy bills, improves worker visibility, and eliminates the frequent re-lamping cycles that plague metal halide and fluorescent systems. Done poorly, it creates uneven light distribution, premature driver failure, and unnecessary safety hazards.
This guide walks through the entire process — from pre-installation planning and mounting height calculations to wiring, aiming, and commissioning. Whether you are a facilities manager overseeing a contractor or an electrician handling the job yourself, these step-by-step instructions and best practices will help you get the most out of your LED high bay investment.
1. Understanding LED High Bay Lights Before You Install
LED high bay fixtures are designed for ceiling heights between 15 feet (4.5 m) and 50+ feet (15+ m). At these heights, the beam angle and lumen output need to be matched carefully to the floor area below. Unlike lower-ceiling troffer or panel lights, high bay fixtures carry significantly higher lumen packages — typically 10,000 lm to 60,000 lm per fixture — because the inverse-square law means light intensity drops sharply as the beam travels downward.
Key Fixture Types
- Round (UFO) High Bay: Compact, 120° to 60° beam options, ideal for warehouses with racking. The circular design makes it easy to aim.
- Linear High Bay: Rectangular strip-style fixtures that mimic fluorescent T8/T5 layouts. Better for wide, open floor areas like assembly lines.
- Low Bay: For ceiling heights of 10–20 ft; technically a separate category but installed with similar principles.
Typical Wattage vs. Ceiling Height
| Ceiling Height | Recommended Wattage | Minimum FC at Floor |
|---|---|---|
| 15–20 ft (4.5–6 m) | 100W–150W | 30–50 fc |
| 20–30 ft (6–9 m) | 150W–240W | 30–50 fc |
| 30–40 ft (9–12 m) | 240W–320W | 30–50 fc |
| 40–50 ft (12–15 m) | 320W–400W | 30–50 fc |
FC = foot-candles. OSHA recommends a minimum of 30 fc for general warehouse tasks and 50 fc for fine assembly work.
2. Pre-Installation Planning
2.1 Conduct a Photometric Layout Study
Before ordering a single fixture, run — or request — a photometric simulation. Most LED manufacturers and distributors provide free IES file-based layouts using software like AGi32, DIALux, or Relux. A proper photometric plan shows:
- Average maintained illuminance (fc or lux)
- Uniformity ratio (average:minimum, target ≥ 3:1 or better at 2:1)
- Hot spots and dark zones near walls
- Fixture count and spacing recommendations
Skipping this step is a common and costly mistake. Facilities that skip photometric planning often end up with over-illuminated center aisles and dark perimeter zones, or they over-specify wattage and waste budget.
2.2 Check the Electrical Infrastructure
LED high bay fixtures typically operate at 100–277V AC (universal voltage) or 347–480V for industrial three-phase applications. Verify:
- Available circuit breaker amperage (typical 20A circuit supports 8–12 LED high bays at 150W each)
- Wire gauge compatibility (12 AWG for 20A circuits, 10 AWG for 30A)
- Whether existing conduit or wire runs are rated for the new load
- Whether occupancy sensors or 0–10V dimming circuits are already present
If you are replacing metal halide fixtures, verify that the old ballasts have been removed and that no capacitor-start wiring remains active. Leaving old ballast wiring live is a fire hazard.
2.3 Choose the Right Mounting Hardware
The three most common mounting options for round LED high bays are:
- Hook/Chain Mount: The standard for most warehouse retrofits. A V-hook or aircraft cable supports the fixture from the ceiling beam. Fast to install, allows minor height adjustment.
- Pendant Rod Mount: A rigid conduit or threaded rod connects the fixture directly to a structural beam. Adds vibration resistance — useful near heavy machinery or loading docks.
- Surface/Flush Mount: For low-clearance areas. Requires a structural ceiling or concrete deck; not suitable for open-web steel joists without an adapter plate.
For linear high bays, you will typically use surface-mount clips or a cable suspension kit that attaches to T-bar or purlins.
2.4 Gather Required Tools and Materials
- Aerial work platform (AWP/scissor lift) or ladder rated for height
- Non-contact voltage tester
- Wire strippers, wire nuts or push-in connectors
- Fish tape or pull wire (if new conduit runs are needed)
- Torque wrench (for structural fasteners, typically 50–80 ft-lb on I-beams)
- Photometric app or light meter (for post-installation verification)
- PPE: hard hat, safety glasses, arc-rated gloves if working on live panels
3. Step-by-Step Installation Process
Step 1: De-energize and Lockout/Tagout (LOTO)
This is non-negotiable. Before touching any wiring, shut off the circuit breaker feeding the lighting circuit, place a lock on the breaker, and tag it with your name and contact information. Use a non-contact voltage tester to confirm zero voltage at the fixture junction box before proceeding. OSHA 29 CFR 1910.147 (Control of Hazardous Energy) requires proper LOTO procedures — violations carry fines up to $15,625 per incident.
Step 2: Remove Existing Fixtures (Retrofit Scenario)
If you are retrofitting from metal halide or high-pressure sodium:
- Lower or disconnect the existing fixture from its mounting hook or conduit whip.
- Disconnect the power leads at the junction box — note wire colors and polarity.
- Remove the old ballast from the junction box entirely; do not leave it in place.
- If the existing conduit whip is a flexible metal conduit (FMC) “whip” pre-wired to the fixture, determine whether it is reusable. Most are — but check the wire gauge is adequate for your new LED wattage.
- Cap off unused wires and secure with electrical tape or wire nuts.
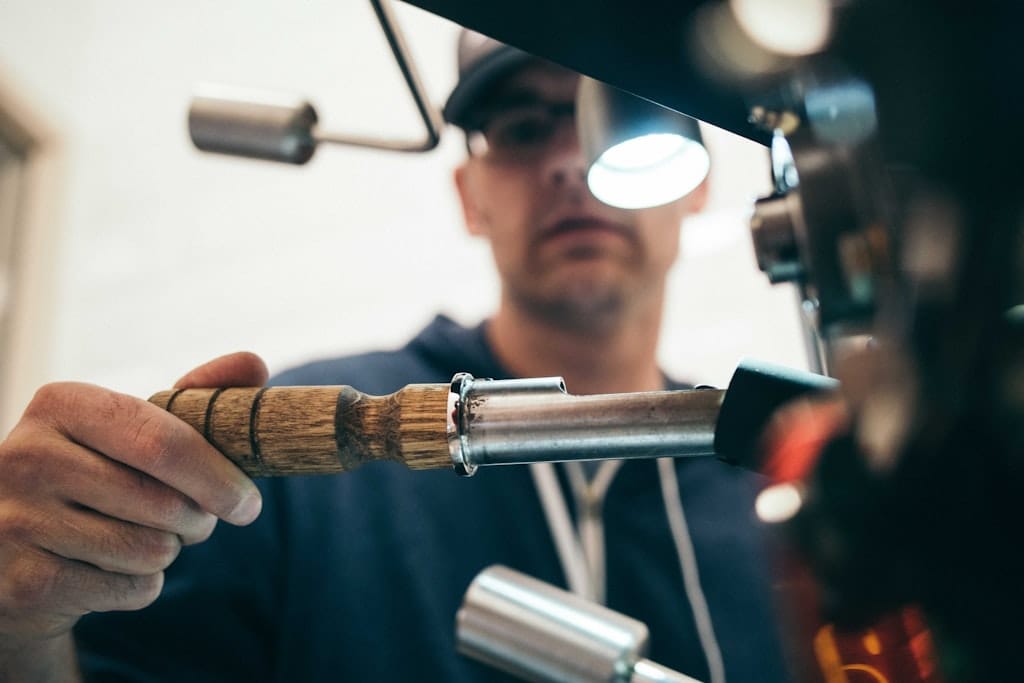
Step 3: Install Mounting Hardware
For hook/chain mount:
- Locate the structural ceiling member (I-beam, purlin, or bar joist) at the planned fixture position per your photometric layout.
- Install a C-clamp or beam clamp rated for at least 4× the fixture weight (safety factor). A 150W UFO high bay typically weighs 6–10 lb (2.7–4.5 kg); a 400W unit can reach 22 lb (10 kg).
- Thread the aircraft cable or chain through the clamp and secure with the provided locking mechanism. Do not use standard chain links rated for less than 250 lb.
- Attach the V-hook or mounting bracket to the fixture body per manufacturer instructions.
For pendant rod mount:
- Drill a hole through the bottom flange of the structural beam (or use a pre-welded conduit entry plate).
- Thread the rigid conduit or all-thread rod through the hole and secure with locknut and washer above and below the beam flange.
- Run the fixture’s power conductors through the conduit to the junction box above.
Step 4: Make Electrical Connections
Most LED high bays include a pre-wired junction box or a quick-connect plug. Standard US wiring:
- Black → Line (hot)
- White → Neutral
- Green or bare copper → Ground
For 277V or 480V three-phase systems, consult the fixture’s wiring diagram — connection points differ by manufacturer. Always use wire nuts rated for the wire gauge and conductor count, or listed push-in connectors rated for solid and stranded wire.
If the fixture includes a 0–10V dimming lead (typically violet and gray wires), connect these to your dimming controller’s output. If dimming is not used, leave the leads capped — the fixture will operate at 100% output by default.
Step 5: Hang the Fixture and Set Beam Angle
For round (UFO) fixtures, the beam angle is fixed by the optic lens. For fixtures with interchangeable reflectors or aiming knuckles:
- Set the primary beam direction straight down for rack aisle lighting.
- Tilt up to 30° for perimeter zone fill where wall illuminance is needed.
- Avoid tilting more than 45° — this creates glare and shifts the useful beam too far from the target zone.
Hang the fixture at the designed mounting height. Varying height by even 2–3 feet significantly changes foot-candle levels because illuminance follows the inverse-square law: double the distance, quarter the light. Stay within ±6 inches of the design mounting height.
Step 6: Restore Power and Test
- Remove LOTO, restore power to the circuit.
- Confirm the fixture illuminates within 1–2 seconds. LED high bays with quality drivers reach full output almost instantly — if the fixture flickers, dims slowly, or does not light, the driver may be incompatible with the supply voltage or there is a wiring fault.
- Check for visible flicker using a smartphone camera in slow-motion mode. Visible bands in the video indicate high-frequency flicker (above 30% flicker percent at 120 Hz). Quality LED drivers should have flicker percent below 8% per IEEE 1789-2015 guidelines.
- Use a light meter to spot-check foot-candle levels at the floor directly below the fixture and at mid-aisle. Compare against your photometric plan targets.
4. Best Practices for Optimal Performance
4.1 Thermal Management: Keep the Driver Cool
The LED driver is the most failure-prone component in any high bay fixture. Driver life is rated at a junction temperature (Tc) — most quality drivers are rated for 70,000 hours at Tc ≤ 75°C. In practice, ambient temperatures in steel-roofed warehouses can reach 40–50°C in summer, leaving very little thermal headroom if the fixture is surface-mounted against a ceiling with no airflow.
Best practices:
- Use pendant or cable-hung mounting wherever possible to allow natural convection around the driver housing.
- If surface mounting is unavoidable, choose fixtures with a thermally decoupled driver compartment or an external driver box.
- Ensure the driver housing is not buried in insulation or blocked by HVAC ductwork.
- In very hot environments (foundries, glass plants, direct-sun steel roofs), derate the fixture by selecting a higher-wattage unit run at 70–80% via 0–10V dimming — this reduces heat generation while maintaining lumen output close to the design target.
4.2 Uniformity vs. Intensity: The Most Common Mistake
Facility managers often focus on peak light levels (“we need 50 fc”) but neglect uniformity. A warehouse with an average of 55 fc but a uniformity ratio of 8:1 (55 fc at center, 7 fc near walls) actually creates more eye strain for workers than a 40 fc space with a 2:1 ratio. The visual system constantly adapts to the darkest visible area, causing fatigue when workers regularly shift gaze between bright and dim zones.
To achieve good uniformity:
- Use a narrower beam angle (60° or 90°) at higher mounting heights to concentrate light on the floor without excessive falloff.
- Add perimeter wall-pack or low-bay fixtures for edge zones; do not try to cover a 200-ft-wide building with only center-aisle high bays.
- Follow the spacing-to-mounting-height (S/MH) ratio recommended by the fixture’s IES data — typically S/MH ≤ 1.2 for 90° optics, ≤ 0.8 for 60° optics.
4.3 Choose the Right Driver for Your Application
Not all LED drivers are equal. For industrial installations, specify:
- Power factor ≥ 0.95 — poor power factor increases apparent power demand and may incur utility surcharges.
- THD (Total Harmonic Distortion) < 20% — high THD causes neutral conductor overheating in large installations.
- Surge protection ≥ 4kV — industrial facilities near heavy machinery or outdoor substations experience regular voltage spikes. Drivers without surge protection have dramatically shorter field lives.
- IP65 or IP66 rating for the driver compartment — in dusty or wet areas (food processing, paper mills, car washes), moisture infiltration into the driver is the leading cause of early failure.
4.4 Install Occupancy Sensors for Maximum Savings
LED high bays are already 60–75% more efficient than the metal halide fixtures they replace. Adding occupancy-based dimming or switching can push total energy savings to 80–90%. A properly designed sensor scheme for a warehouse:
- Aisle sensors: Passive infrared (PIR) or ultrasonic sensors mounted at 15–20 ft, covering a 40–60 ft detection zone. Set to dim to 10% after 5 minutes of inactivity, not fully off — re-strike time for LEDs is under 0.5 seconds but employees find sudden dark areas unsettling.
- Daylight harvesting: For facilities with skylights or clerestory windows, a photosensor connected to the 0–10V dimming input maintains a consistent 50 fc regardless of sky conditions, saving significant energy during daylight hours.
- High-low switching: A simpler approach for facilities without 0–10V dimming: fixtures switch between 100% and a fixed low level (e.g., 30%) based on occupancy. Lower upfront cost, less precise control.
DLC-listed LED high bays with built-in 0–10V dimming are eligible for the highest utility rebate tiers in most states, which can offset 20–40% of the installed cost.
4.5 Label and Document Your Installation
Industrial lighting systems are maintained for 10–15 years. Without documentation, future technicians waste hours identifying circuit assignments, fixture models, and sensor zones. At project completion:
- Update the facility’s reflected ceiling plan (RCP) with fixture locations, circuit IDs, and mounting heights.
- Tag each circuit breaker clearly (“Warehouse Aisle A–C Lighting – 20A”).
- Record the fixture model, wattage, lumen output, CCT, and driver type in the maintenance log.
- Note the photometric results (average fc, uniformity ratio) so future LED upgrade projects have a baseline.
5. Common Installation Mistakes and How to Avoid Them
Mistake 1: Reusing Old Conduit Whips Without Inspection
Metal halide whips often contain 14 AWG wire, which is undersized for LED drivers drawing 1.5–2A at 120V. Always verify conductor gauge before reuse. Undersized wire creates heat, degrades insulation, and is a fire risk.
Mistake 2: Mounting Too High “For More Coverage”
Raising fixtures above the photometric design height reduces foot-candles at the floor by the square of the distance change. A fixture designed for 25 ft that is instead hung at 35 ft delivers only 51% of the designed floor illuminance. If your space requires higher mounting, specify a higher-lumen fixture — do not just raise the original one.
Mistake 3: Ignoring Glare Index
High bay fixtures above worker eye level in a facility with light-colored walls can create uncomfortable glare (Unified Glare Rating, UGR > 25). Specify fixtures with a UGR < 22 for assembly areas, inspection stations, or any task area where workers regularly look up or toward bright surfaces.
Mistake 4: Skipping the Post-Installation Light Meter Verification
Photometric simulations use maintained illuminance values (accounting for light loss factors like dirt and lumen depreciation over time). At initial installation, measured levels should be 15–20% higher than the simulated maintained values. If measured levels are already at or below the design target on day one, the system is under-specified and will fall short of required lighting levels before the next maintenance cycle.
Mistake 5: Using Non-Listed Wire Connectors
Push-in connectors (e.g., Wago 221 series) are widely used but must be UL-listed and rated for the conductor type (solid vs. stranded) and gauge. Using unlisted or undersized connectors in a high bay junction box is a code violation and a fire risk — particularly in vibration-prone environments where connections can loosen over time.
6. Post-Installation Commissioning Checklist
Before signing off on an LED high bay installation, verify each item:
- ☐ All fixtures illuminate at full output within 2 seconds of circuit energization
- ☐ No visible flicker (confirmed with slow-motion video or flicker meter)
- ☐ Measured foot-candles at floor ≥ 110% of designed maintained illuminance
- ☐ Uniformity ratio (avg:min) ≤ 3:1 across primary work zones
- ☐ All junction box covers secured; no exposed conductors
- ☐ Mounting hardware torqued to spec; no fixtures swinging freely
- ☐ Occupancy sensor time-delays and dimming levels tested and adjusted
- ☐ Circuit breaker labels updated
- ☐ Utility rebate documentation prepared (DLC listing, wattage, quantity)
- ☐ Facility maintenance log updated with fixture data
7. Maintenance and Expected Service Life
A well-installed LED high bay system requires minimal maintenance compared to metal halide systems that needed re-lamping every 10,000–20,000 hours. Quality LED high bay fixtures carry an L70 rating of 50,000–100,000 hours (L70 = the point at which output drops to 70% of initial). At 16 operating hours per day, 50,000 hours equals approximately 8.5 years before the first output degradation becomes perceptible.
Planned maintenance tasks:
- Annual: Wipe down fixture lenses and driver housings to remove dust accumulation. In dusty facilities (grain, wood, cement), clean every 6 months — dust on the optic can reduce output by 15–20%.
- Every 3–5 years: Retorque mounting hardware, particularly in facilities with heavy forklift traffic or overhead crane vibration.
- At 7–10 years: Re-run a photometric verification. If floor illuminance has dropped below the minimum design target, assess whether driver replacement or full fixture replacement is more cost-effective.
Conclusion
Installing LED high bay lights is a straightforward project when the planning work is done first. A good photometric layout, properly sized electrical circuits, correct mounting hardware, and attention to thermal management will deliver 15–20 years of reliable, efficient industrial lighting with virtually no unplanned maintenance.
The biggest differentiator between a good LED high bay installation and a poor one is not the fixture brand — it is the quality of the planning, the care taken with connections, and the post-installation verification process. Follow the checklist in this guide, document your work, and your facility will benefit from the energy savings and lighting quality advantages of LED technology for a decade or more.
For warehouse and factory environments specifically, pairing the right LED high bay wattage with occupancy sensors and a basic 0–10V dimming system typically achieves a payback period of 2–4 years, with ongoing energy savings of $0.50–$1.20 per square foot annually depending on prior lighting type and local utility rates.